How To Install Zabbix 7.0 on Debian 127 min read
Great news! Zabbix already release two beta version. Now I want to share how to install zabbix 7.0 on Debian 12. Zabbix 7.0 is is new look for dashboard and other settings is same as old.
★ How To Multiple Databases Replication On Ubuntu 16.04
★ How To Install OsTicket v1.14 On Centos 7 With Apache
My serve info :
- Server IP : 10.66.10.12
- Disk : 25 GB
- RAM : 1GB
- vCPU : 2
- Web Server : Apache
- Database : MariaDB
- PHP : 8.0 Must be for Zabbix 7.0
Step #01: For ready update and upgrade and change host name.
root@zabbix:~# apt update && apt -y upgrade
root@zabbix:~# apt install -y apt-transport-https lsb-release ca-certificates
Change hostname
root@zabbix:~# vi /etc/hosts
10.66.10.12 zabbix
Step #02: Install php package and Zabbix 7.0
root@zabbix:~# apt update && apt -y upgrade
root@zabbix:~# apt install -y apt-transport-https lsb-release ca-certificates
root@zabbix:~# add-apt-repository -y ppa:ondrej/php
root@zabbix:~# apt install -y php php-mysql php-common php-cli php-common php-json php-readline php-mbstring php-gd php-zip php-curl
root@zabbix:~# nano /var/www/html/info.php
Insert php info code into info.php file
<?php phpinfo(); ?>
Then access your server ip address as like below.
http://10.66.10.12/info.php
Step #03: Install Database Server for Zabbix 7.0
root@zabbix:~# apt install -y mariadb-server
root@zabbix:~# 	wget https://repo.zabbix.com/zabbix/6.5/debian/pool/main/z/zabbix-release/zabbix-release_6.5-1+debian12_all.deb
root@zabbix:~# 	dpkg -i zabbix-release_6.5-1+debian12_all.deb
root@zabbix:~# 	apt update
root@zabbix:~# 	apt install -y zabbix-server-mysql zabbix-frontend-php zabbix-nginx-conf zabbix-sql-scripts zabbix-agent
Step #04: Create database and import database into created database.
root@zabbix:~# mysql -uroot -p
By default mysql root password is blank. after login mysql terminal then create database with user password.
MariaDB [(none)]> SELECT user,authentication_string,plugin,host FROM mysql.user;
MariaDB [(none)]> ALTER USER root@localhost IDENTIFIED VIA mysql_native_password;
MariaDB [(none)]> SET PASSWORD = PASSWORD('P@ssw0rd0@123');
MariaDB [(none)]> SELECT user,authentication_string,plugin,host FROM mysql.user;
MariaDB [(none)]> create database zabbix_db character set utf8mb4 collate utf8mb4_bin;
MariaDB [(none)]> create user zabbix_user@localhost identified by 'P@ssw0rd0@123';
MariaDB [(none)]> grant all privileges on zabbix_db.* to zabbix_user@localhost;
MariaDB [(none)]> set global log_bin_trust_function_creators = 1;
MariaDB [(none)]> flush privileges;
MariaDB [(none)]> \q
Import zabbix default database using below command.
root@zabbix:~# zcat /usr/share/zabbix-sql-scripts/mysql/server.sql.gz | mysql --default-character-set=utf8mb4 -uzabbix_user -p zabbix_db
Change global log_bin_trust_function_creators
root@zabbix:~# mysql -uroot -p
set global log_bin_trust_function_creators = 0;
flush privileges;
\q
Check Zabbix server config file for database name, database password and database user are included.
root@zabbix:~# nano /etc/zabbix/zabbix_server.conf
DBName=zabbix_db
DBUser=zabbix_user
DBPassword=passw0rd@123
Change nginx server config.
root@zabbix:~# nano /etc/zabbix/nginx.conf
Remove # from below lines.
listen 80;
server_name 10.66.10.12;
Now restart all service using below command.
root@zabbix:~# service apache2 status
root@zabbix:~# service apache2 stop
root@zabbix:~# systemctl restart zabbix-server zabbix-agent nginx php8.2-fpm
root@zabbix:~# systemctl enable zabbix-server zabbix-agent nginx php8.2-fpm
Browse server ip address using any browser. This is default user name and password for Zabbix server.
Server URL : http://10.66.10.12/
Step #05: Now frontend install using browser. New welcome page for Zabbix 7.0.
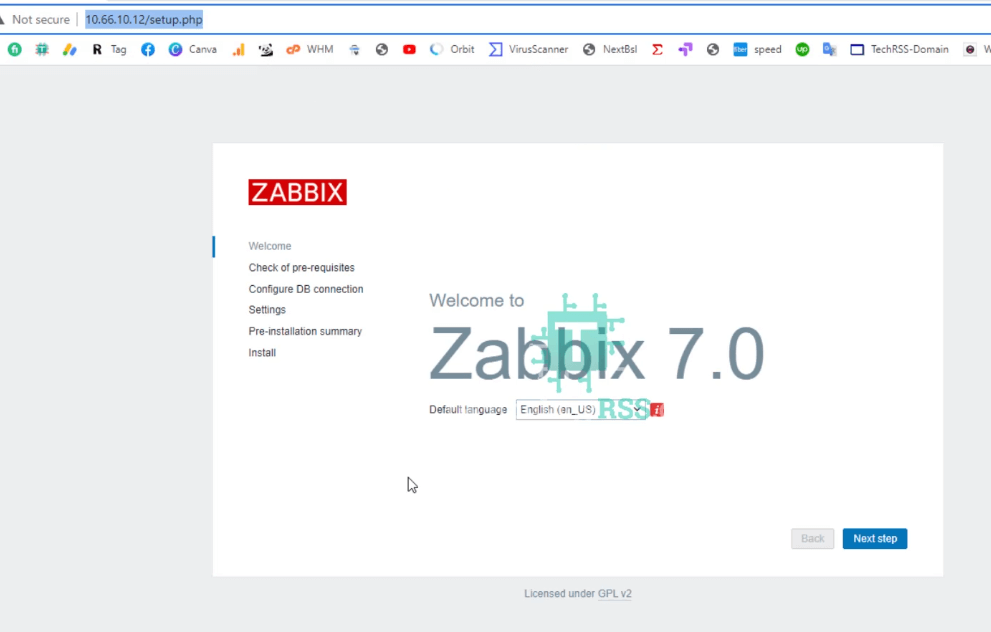
This is welcome page. Click Next step
Step #06: Check of pre-requisites for before installation Zabbix 7.0.
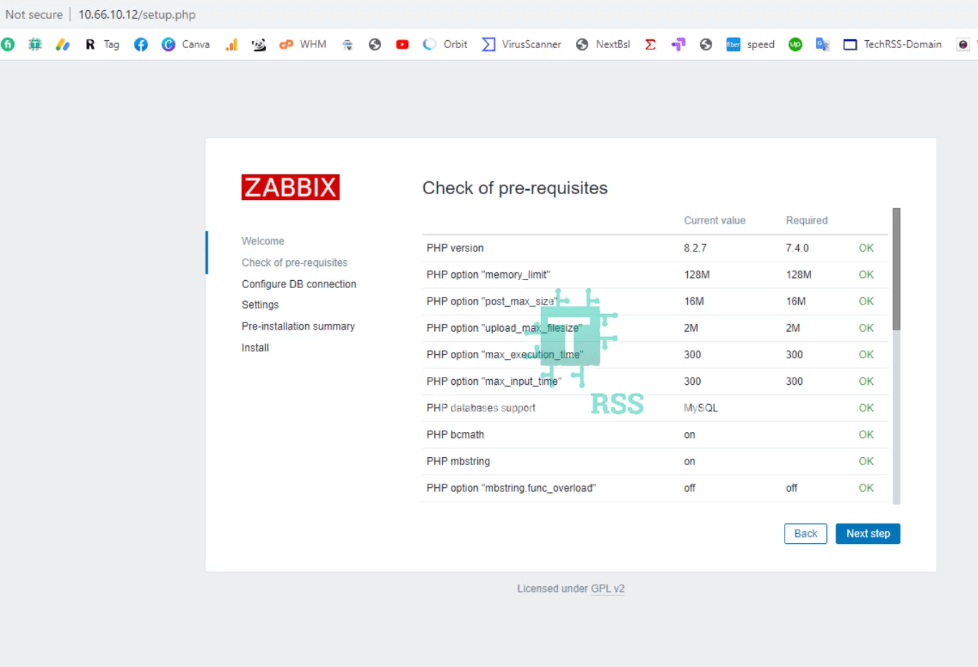
Check pre-requisite all is ok then Click Next step
Step #07: Check configuration database connection.
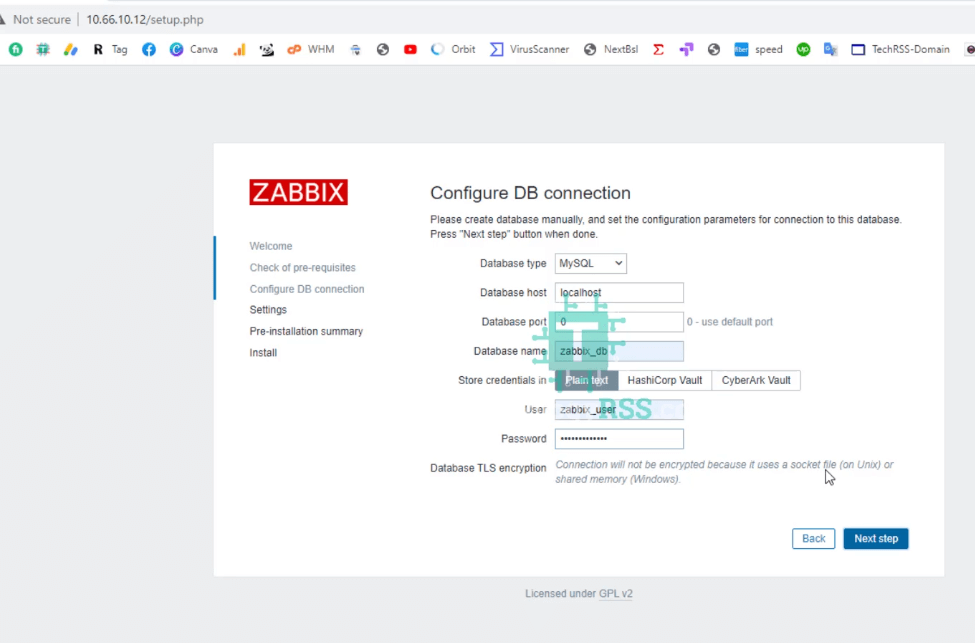
Configure database connection already created from Step #03 Click Next step
Step #08: You can edit host and Name.
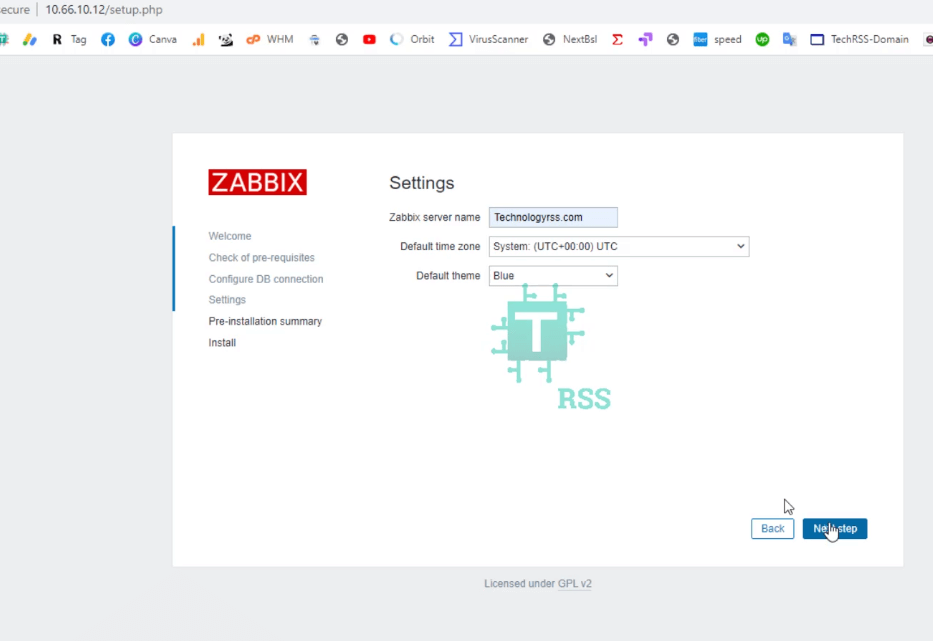
Zabbix server details Click Next step
Step #09: If any missing so now check pre-installation summary.

Pre-installation summary just see this then Click Next step
Step #09: Finally Congratulations! You have successfully installed Zabbix frontend.

Click Finish
Server URL : http://10.66.10.12/
User Name : Admin [Must be use ‘A’]
Password : zabbix
Now login and see new look for Zabbix 5.0 version as like below.

If any problem so please see my YouTube video for more details. Don’t for get share any social network.

Thanks to all.
- How To Enable SSH On Debian 13 Server - September 13, 2025
- Is Debian 13 Server on VirtualBox the EASIEST Way to Get Started - September 11, 2025
- How To Install Zabbix Server 7.4 On Ubuntu 22.04 - September 10, 2025