How To Install WordPress 5.7 On Ubuntu 21.0411 min read
In this tutorial how to install WordPress 5.7 on Ubuntu 21.04 server. WordPress is a popular content management system. You can easily manage your content using WordPress. Most of the web site created using WordPress cms.
★ How To Upgrade Zabbix Server 4.0 To 4.4 On CentOS 8
★ Create WordPress Social Login Plugin With Facebook Developer
My server info.
#######################################
Server IP 	: 10.66.100.15
Disk 		: 25 GB
RAM		: 1GB
vCPU 		: 2
Service 	: WordPress
Web 		: Apache
Database 	: Mariadb
Php 		: 8.0
#######################################
Step #01: Must be server update and upgrade.
root@wordpress:~# lsb_release -a
root@wordpress:~# apt-get update && apt-get upgrade -y
Install web service and database nariadb.
root@wordpress:~# apt-get install -y apache2 apache2-utils mariadb-server
root@wordpress:~# systemctl enable apache2
root@wordpress:~# systemctl start apache2
root@wordpress:~# systemctl enable mariadb
root@wordpress:~# systemctl start mariadb
Setup mysql root password.
root@wordpress:~# mysql_secure_installation
Note : Default root password is blank then setup root password.
NOTE: RUNNING ALL PARTS OF THIS SCRIPT IS RECOMMENDED FOR ALL MariaDB
      SERVERS IN PRODUCTION USE!  PLEASE READ EACH STEP CAREFULLY!

In order to log into MariaDB to secure it, we'll need the current
password for the root user. If you've just installed MariaDB, and
haven't set the root password yet, you should just press enter here.

Enter current password for root (enter for none):
OK, successfully used password, moving on...

Setting the root password or using the unix_socket ensures that nobody
can log into the MariaDB root user without the proper authorisation.

You already have your root account protected, so you can safely answer 'n'.

Switch to unix_socket authentication [Y/n] y
Enabled successfully!
Reloading privilege tables..
 ... Success!


You already have your root account protected, so you can safely answer 'n'.

Change the root password? [Y/n] y
New password:
Re-enter new password:
Password updated successfully!
Reloading privilege tables..
 ... Success!


By default, a MariaDB installation has an anonymous user, allowing anyone
to log into MariaDB without having to have a user account created for
them.  This is intended only for testing, and to make the installation
go a bit smoother.  You should remove them before moving into a
production environment.

Remove anonymous users? [Y/n] y
 ... Success!

Normally, root should only be allowed to connect from 'localhost'.  This
ensures that someone cannot guess at the root password from the network.

Disallow root login remotely? [Y/n] y
 ... Success!

By default, MariaDB comes with a database named 'test' that anyone can
access.  This is also intended only for testing, and should be removed
before moving into a production environment.

Remove test database and access to it? [Y/n] y
 - Dropping test database...
 ... Success!
 - Removing privileges on test database...
 ... Success!

Reloading the privilege tables will ensure that all changes made so far
will take effect immediately.

Reload privilege tables now? [Y/n] y
 ... Success!

Cleaning up...

All done!  If you've completed all of the above steps, your MariaDB
installation should now be secure.

Thanks for using MariaDB!
Step #02: Install some package and php.
root@wordpress:~# add-apt-repository -y ppa:ondrej/php
root@wordpress:~# apt update
root@wordpress:~# apt-get install -y php8.0 php8.0-mysql libapache2-mod-php8.0 php8.0-cli php8.0-cgi php8.0-gd
Test php is working fine. Create one tech.php file.
root@wordpress:~# nano /var/www/html/tech.php
Insert below line into this file.
<?php
phpinfo(); //PHP code goes here
?>
Then browse your server ip address.
http://10.66.100.15/tech.php
Step #03: Download latest WordPress and setup permission.
root@wordpress:~# wget -c http://wordpress.org/latest.tar.gz
root@wordpress:~# tar -xzvf latest.tar.gz
root@wordpress:~# rsync -av wordpress/* /var/www/html/
root@wordpress:~# chmod -R 755 /var/www/html/
root@wordpress:~# chown -R www-data:www-data /var/www/html/
root@wordpress:~# rm -rf /var/www/html/index.html
Create database using mysql terminal.
root@wordpress:~# mysql -u root -p
Then run below command.
MariDB [(none)]> create database wp_db character set utf8 collate utf8_bin;
MariDB [(none)]> grant all privileges on wp_db.* TO 'wp_db_user'@'localhost' identified by 'wp_db_pass@123';
MariDB [(none)]> flush privileges;
MariDB [(none)]> \q
copy wp-config-sample.php file name as wp-config.php
root@wordpress:~# mv /var/www/html/wp-config-sample.php /var/www/html/wp-config.php
Open wp-config.php file using any editor
root@wordpress:~# vi /var/www/html/wp-config.php
Insert database info into this file wp-config.php
define('DB_NAME', 'wp_db');
define('DB_USER', 'wp_db_user');
define('DB_PASSWORD', 'wp_db_pass@123');
define('DB_HOST', 'localhost');
define('DB_CHARSET', 'utf8');
define('DB_COLLATE', '');
Then save and exit. Type press Esc type :wq then press Enter for save this config file.
Now restart some package.
root@wordpress:~# systemctl restart apache2.service
root@wordpress:~# systemctl restart mysql.service
Open default web config file then add your server ip address.
root@wordpress:~# nano /etc/apache2/sites-available/000-default.conf
as like below config.
<VirtualHost *:80>
ServerAdmin webmaster@localhost
DocumentRoot /var/www/html
ServerName 10.66.100.15
<Directory /var/www/html/>
AllowOverride All
</Directory>
Now setup rewrite config and restart apache service.
root@wordpress:~# a2enmod rewrite
root@wordpress:~# service apache2 restart
root@wordpress:~# touch /var/www/html/.htaccess
root@wordpress:~# chown :www-data /var/www/html/.htaccess
root@wordpress:~# chmod 664 /var/www/html/.htaccess
Now setup rewrite config and restart apache service.
http://10.66.100.15/
Step #04: Goto your server ip address and complete installation process.
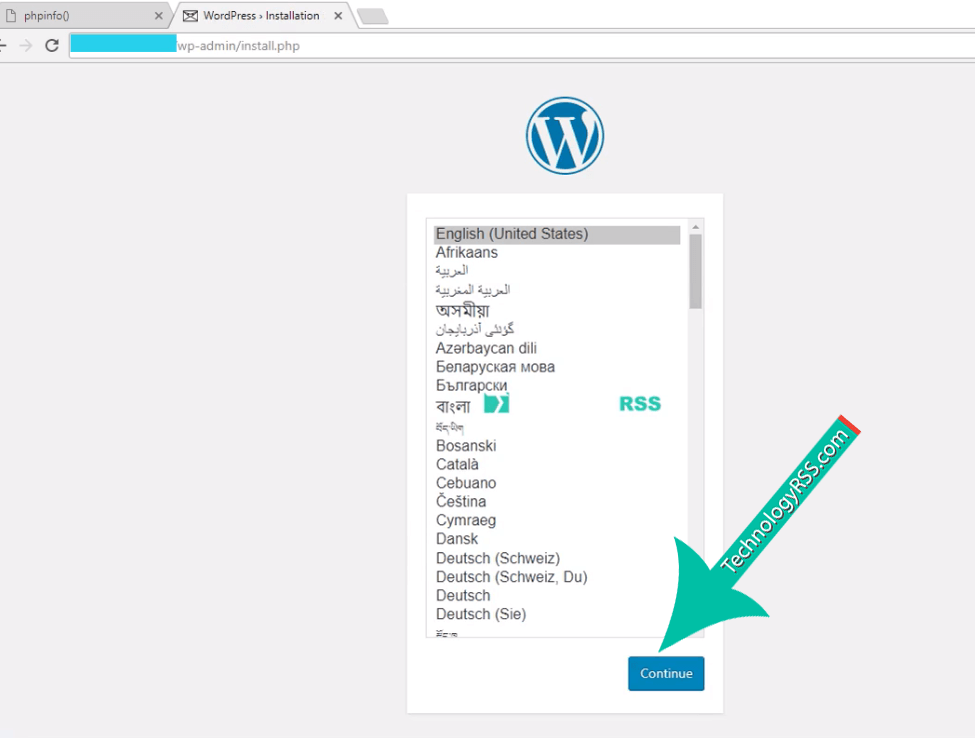
Welcome
Welcome to the famous five-minute WordPress installation process! Just fill in the information below and you’ll be on your way to using the most extendable and powerful personal publishing platform in the world.
Step #05: Type site title, username, password and mail.
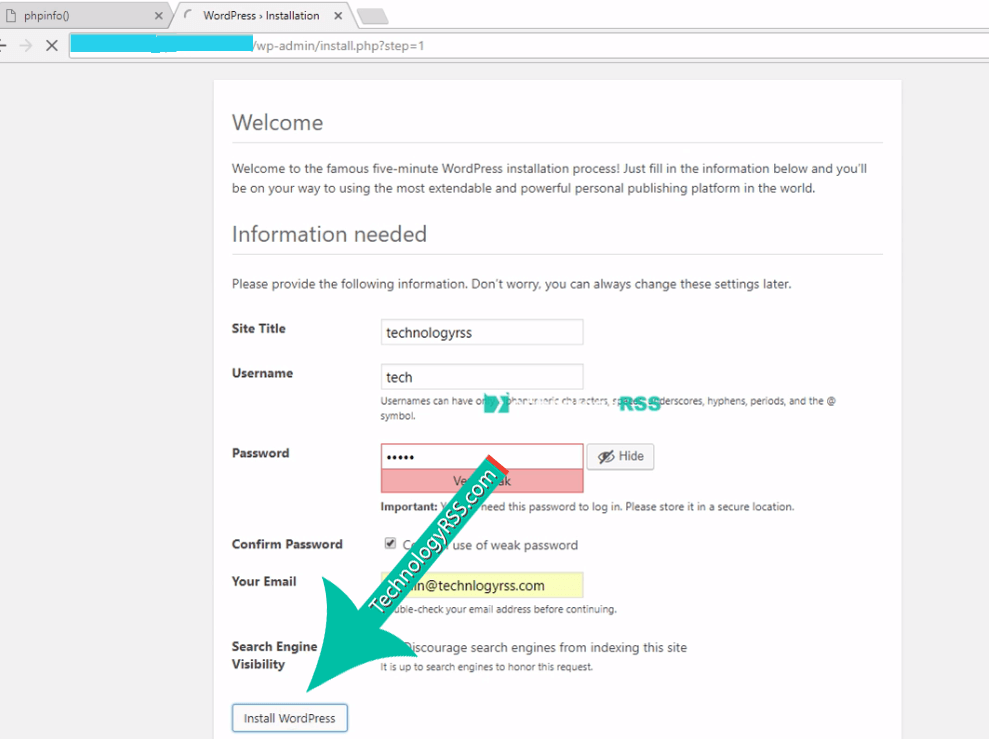
Note : This image is my all post use same image, So don’t be hesitate user name and site title.
Step #06: Then come login page.
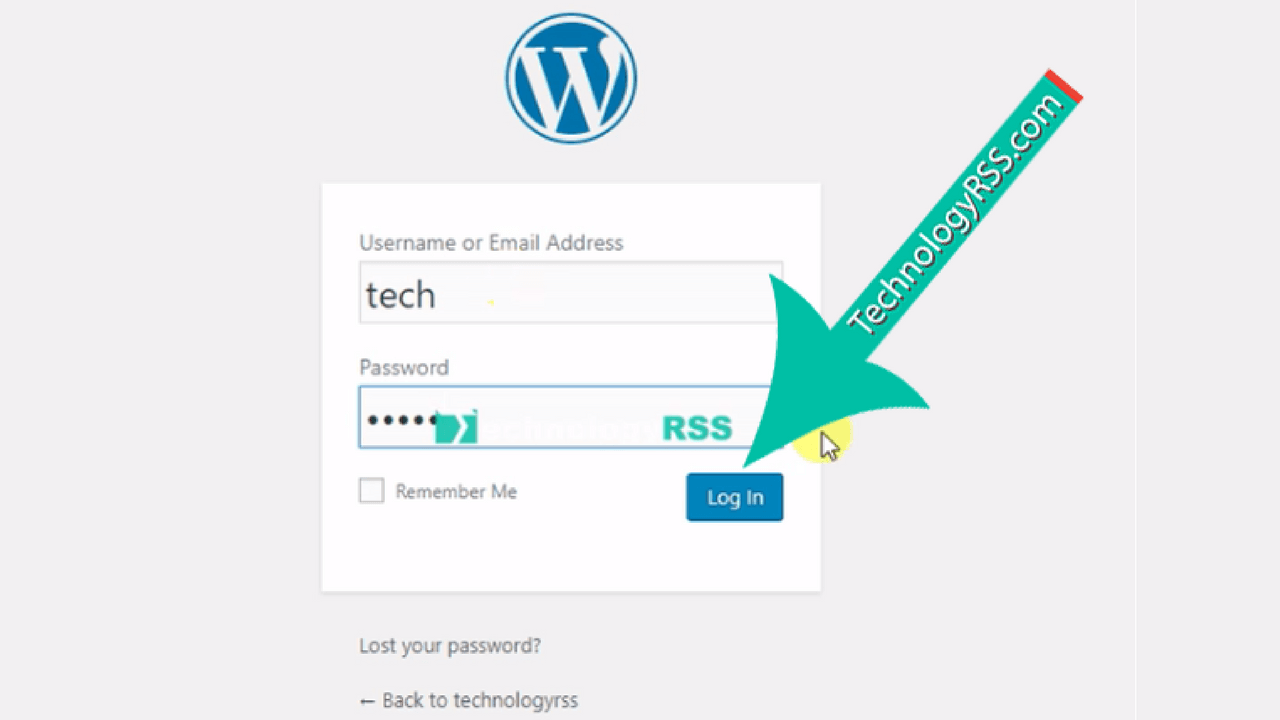
Note : This image is my all post use same image, So don’t be hesitate user name and site title.
Then show Dashboard page.
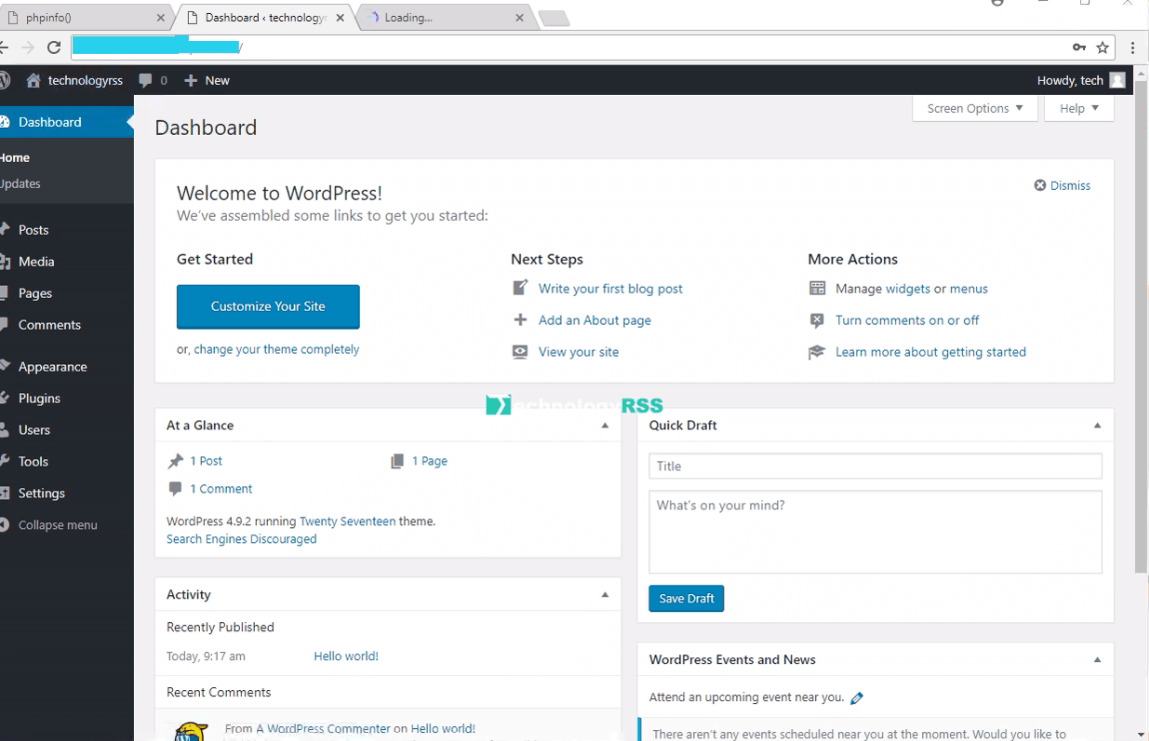
How To Create First Post On Your WordPress Blog
If any problem so please see my YouTube channel for more videos.
- How To Install Zabbix Server 6.4 On AlmaLinux 8 Server - August 9, 2024
- How To Clear RAM Memory Cache Buffer Linux Server - February 29, 2024
- How To Install Apache Cloud Stack Management Server 4.17 On Ubuntu 22.04 - February 1, 2024
We really appreciate for your support for buying me a coffee.
It takes us a while to compose and upload new content, as they have to be checked to see if Properly works. We appreciate you if you help me for one cup of coffee to keep us awake and always deliver good quality content.
No contribution is small of an amount. We are grateful for any amount you support us with. Thank you!


