How To Install CEPH Cluster On Centos 7 Using Single Server – Part 24 min read
In this tutorial, how to install ceph cluster on centos 7 using single server. Ceph is an open source object storage solution. Ceph official requirements multiple server but I will show how to using single server.
##############################
Server IP	: 10.66.11.25
Hostname 	: ceph-node
Disk 		: 15 GB
RAM		: 1GB
vCPU 		: 2
Service 	: CEPH STORAGE
##############################
Note : Before installing CEPH must be the entry DNS name on your local DNS server host name to IP can resolve it.
Step #01: Prepare ceph server and nslookup check.
[root@ceph-node ~]# yum install bind-utils
[root@ceph-node ~]# nslookup ceph-node
[root@ceph-node ~]# cat /etc/redhat-release
[root@ceph-node ~]# su cephadmin
[root@ceph-node ~]# su cephadmin
[cephadmin@ceph-node root]$ cd
Note : Must be resolve your server name using your local dns server otherwise can’t install ceph cluster properly.
you can find this guide how to install bind9 on ubuntu 20.04 on your local server.
Step #02: Add ceph official repo and install python2.
[cephadmin@ceph-node ~]$ sudo rpm -Uvh https://download.ceph.com/rpm-mimic/el7/noarch/ceph-release-1-1.el7.noarch.rpm
[cephadmin@ceph-node ~]$ sudo yum install -y https://dl.fedoraproject.org/pub/epel/epel-release-latest-7.noarch.rpm
[cephadmin@ceph-node ~]$ sudo yum install ceph-deploy python2-pip  -y
[cephadmin@ceph-node ~]$ mkdir storage_cluster
[cephadmin@ceph-node ~]$ cd storage_cluster
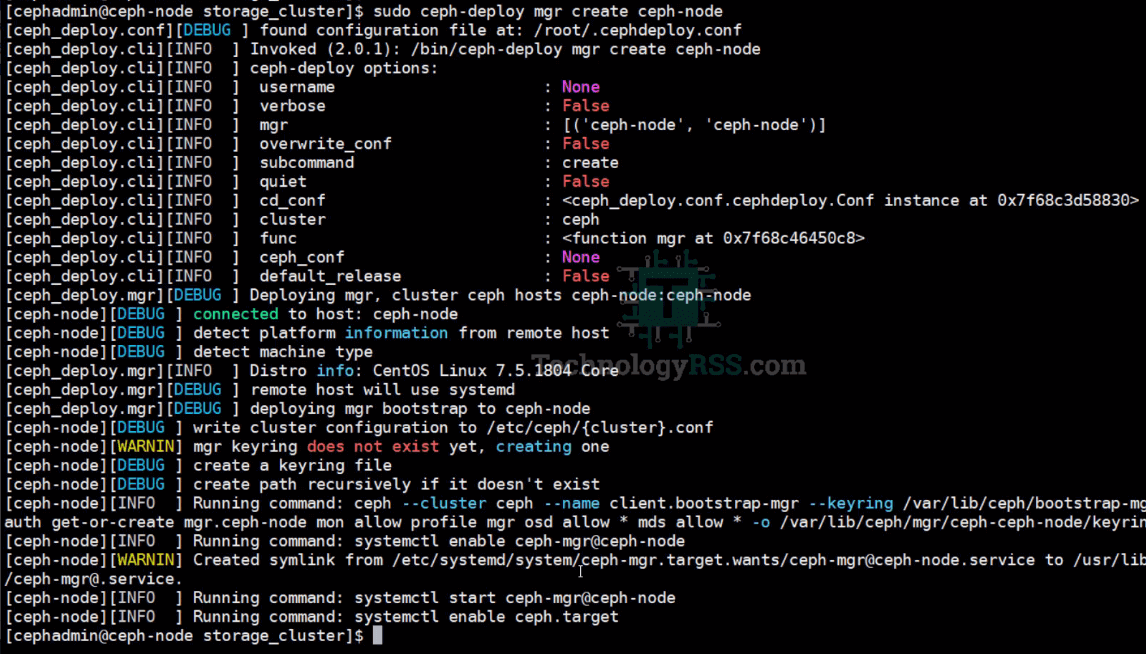
Step #03: Initial deploy and mgr create.
[cephadmin@ceph-node storage_cluster]$ sudo ceph-deploy new ceph-node
[cephadmin@ceph-node storage_cluster]$ sudo ceph-deploy install ceph-node
[cephadmin@ceph-node storage_cluster]$ sudo ceph-deploy mon create-initial
[cephadmin@ceph-node storage_cluster]$ sudo ceph-deploy admin ceph-node
[cephadmin@ceph-node storage_cluster]$ sudo ceph-deploy mgr create ceph-node
Now add my testing 20GB disk from my xen server additional disk.
Note : Must be replace your disk name.
Now show your server all disk using below command.
[cephadmin@ceph-node storage_cluster]$ sudo lsblk
[cephadmin@ceph-node storage_cluster]$ sudo lshw -class disk
[cephadmin@ceph-node storage_cluster]$ sudo sfdisk -l -uM
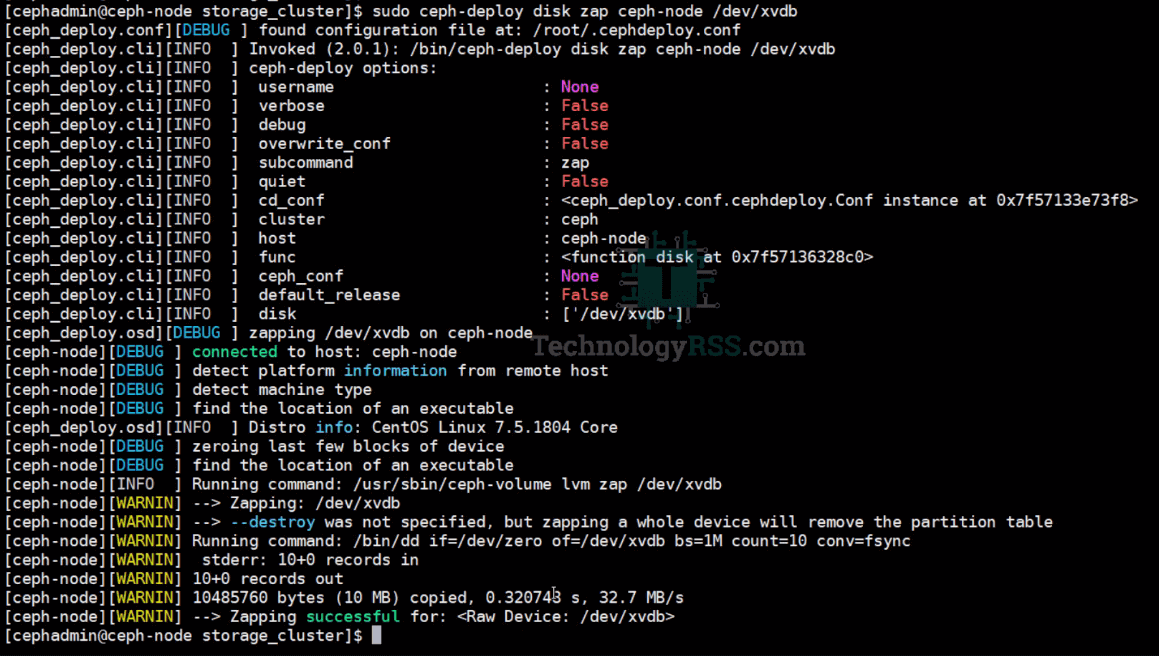
Step #04: When ready your disk then deploy ceph cluster.
[cephadmin@ceph-node storage_cluster]$ udo ceph-deploy disk list ceph-node
[cephadmin@ceph-node storage_cluster]$ sudo ceph-deploy disk zap ceph-node /dev/xvdb
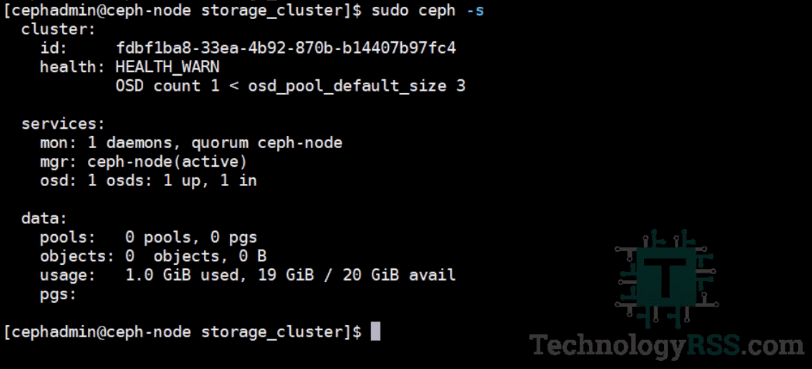
Then create osd using your same disk and ceph host name.
[cephadmin@ceph-node storage_cluster]$ sudo ceph-deploy osd create --data /dev/xvdb ceph-node
[cephadmin@ceph-node storage_cluster]$ sudo ceph -s
As like below image if all is working fine.
If you see any error so please see my YouTube channel for more update. Please share on any social media.

Thanks to all.
- How To Install Zabbix Server 6.4 On AlmaLinux 8 Server - August 9, 2024
- How To Clear RAM Memory Cache Buffer Linux Server - February 29, 2024
- How To Install Apache Cloud Stack Management Server 4.17 On Ubuntu 22.04 - February 1, 2024

We really appreciate for your support for buying me a coffee.
It takes us a while to compose and upload new content, as they have to be checked to see if Properly works. We appreciate you if you help me for one cup of coffee to keep us awake and always deliver good quality content.
No contribution is small of an amount. We are grateful for any amount you support us with. Thank you!

pas mon create-initial error trs gmn ya?
you follow my steps?
I was able to follow the instructions and it installed properly, however I am unable to access the Admin Console, what will the URL be?
You can see my all step from youtube channel.