How To Upgrade Zabbix Server 4.0 To 5.0 Ubuntu 18.045 min read
In this tutorial how to upgarde Zabbiz server 4.0 to 5.0 using Ubuntu 18.04 server. You can follow this step for your local server or public server for upgrade zabbix server version 4.0 to 5.0 or latest.
★ How To Install Apache Cloud Stack Management Server 4.15 On Ubuntu 16.04
★ How To Install Bagisto on Ubuntu 20.04 Server
My server info :
############################################
Server IP 	: 10.66.11.5
Disk 		: 25 GB
RAM		: 1 GB
vCPU 		: 2
Service 	: ZABBIX Backup & Restore
Web 		: Apache
Database 	: Mariadb
Php 		: 7.2 Must
############################################
Step #01: Check server version & ip address using below command.
root@Zabbix-Srv:~# lsb_release -a && ip r
Create backup folder for backup database configuration file and database.
root@Zabbix-Srv:~# mkdir backup
root@Zabbix-Srv:~# cp /etc/zabbix/zabbix_server.conf /root/backup
root@Zabbix-Srv:~# cp /etc/zabbix/zabbix_agentd.conf /root/backup
root@Zabbix-Srv:~# cp /etc/zabbix/web/zabbix.conf.php /root/backup
root@Zabbix-Srv:~# mysqldump -u root -p zabbix_db > /root/backup/zabbix_db.sql
Then type your mysql root password.
Check your current Zabbix server version using below command.
root@Zabbix-Srv:~# zabbix_server -V
Step #02: Download Zabbix 5.0 deb file from official link.
root@Zabbix-Srv:~# wget http://repo.zabbix.com/zabbix/5.0/ubuntu/pool/main/z/zabbix-release/zabbix-release_5.0-1%2Bbionic_all.deb
Then run downloaded deb file using below command.
root@Zabbix-Srv:~# dpkg -i zabbix-release_5.0-1+bionic_all.deb
Then update and upgrade command run from your server.
root@Zabbix-Srv:~# apt-get update
root@Zabbix-Srv:~# apt-get install --only-upgrade zabbix-server-mysql zabbix-agent zabbix-frontend-php
You see for confirmation The default action is to keep your current version. Now press Y for yes.
Then you find any error log from log file.
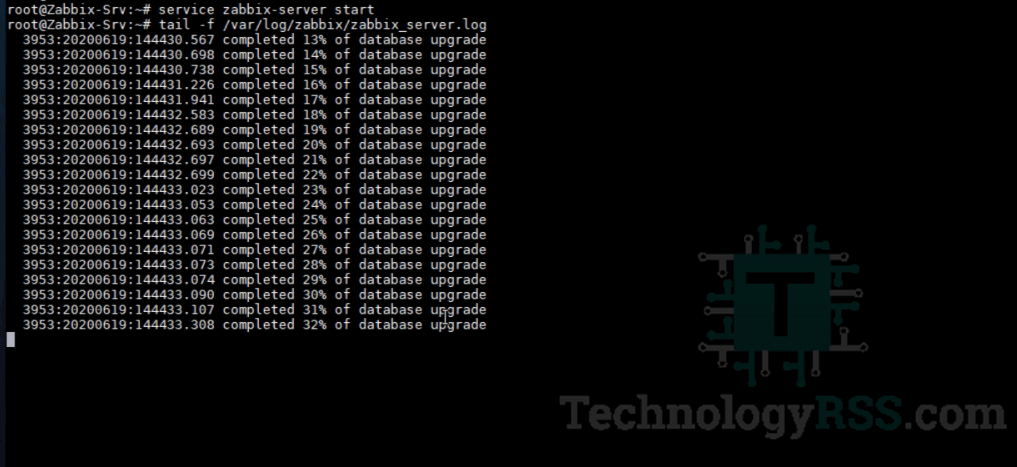
root@Zabbix-Srv:~# tail -f /var/log/zabbix/zabbix_server.log
Find out wany error from log file, I see database name, user name & password not match. That’s why can’t connect to database using my old user password. I think zabbix server conf file replace using default settings.

Now stop and start zabbix service using below command.
root@Zabbix-Srv:~# service zabbix-server stop
root@Zabbix-Srv:~# service zabbix-server start
Open zabbix server configuration file and replace as your old password.
root@Zabbix-Srv:~# vi /etc/zabbix/zabbix_server.conf
My database name, user name & password as like below. So must be collect your exact details from your old config file.
DBName=zabbix_db
DBUser=zabbix_user
DBPassword=passw0rd
Press Esc type :wq then press Enter for save.
or
just you copy your old config file using below command.
root@Zabbix-Srv:~# cp /root/backup/zabbix_server.conf /etc/zabbix/
root@Zabbix-Srv:~# cp /root/backup/zabbix_agentd.conf /etc/zabbix/
root@Zabbix-Srv:~# cp /root/backup/zabbix.conf.php /etc/zabbix/web/
Then restart zabbix service using below command.
root@Zabbix-Srv:~# service zabbix-server stop
root@Zabbix-Srv:~# service zabbix-server start
root@Zabbix-Srv:~# tail -f /var/log/zabbix/zabbix_server.log
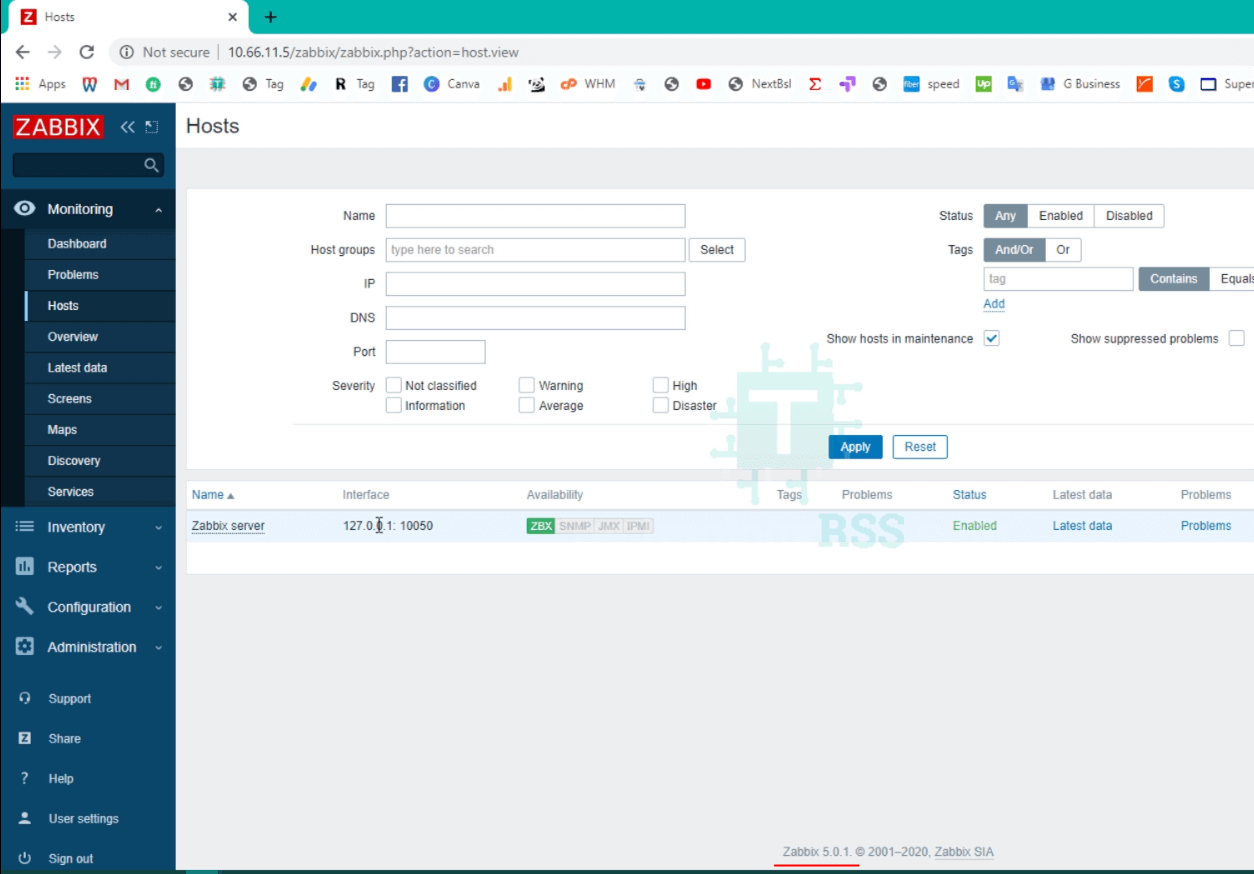
Now access your zabbix server ip address from your pc.
http://10.66.11.5/zabbix/
You can find more video from my YouTube channel for using Zabbix server. Also share your social network for your friends. If you face any issue, so let me know from comment section. I will update to as soon as possible.

Thanks to all.
- How To Clear RAM Memory Cache Buffer Linux Server - February 29, 2024
- How To Install Apache Cloud Stack Management Server 4.17 On Ubuntu 22.04 - February 1, 2024
- How To Install Zabbix Server 6.4 On Ubuntu 22.04 - October 24, 2023

We really appreciate for your support for buying me a coffee.
It takes us a while to compose and upload new content, as they have to be checked to see if Properly works. We appreciate you if you help me for one cup of coffee to keep us awake and always deliver good quality content.
No contribution is small of an amount. We are grateful for any amount you support us with. Thank you!