How To Install Joomla 4 On Ubuntu 18.046 min read
Joomla! is an open source content management system (CMS). Many web site built using Joomla!. So I want to share how to install Joomla! 4 on your Ubuntu 18.04 server.
★ How To Install Google Chrome On Ubuntu Gnome Desktop 16.04
★ How To Install Zabbix 5.0 On Centos 7
Step #01: Install web server, database server & php for required Joomla! install.
root@Joomla-CMS:~# vi /etc/resolv.conf
Insert nameserver 8.8.8.8
then save it
root@Joomla-CMS:~# apt-get update
root@Joomla-CMS:~# apt-get upgrade -y
root@Joomla-CMS:~# apt-get install apache2 mariadb-{server,client} php php-xml php-mysql php-zip -y
root@Joomla-CMS:~# systemctl is-active mysql
root@Joomla-CMS:~# mysql_secure_installation
Step #02: Setup secure installation for create root password.
NOTE: RUNNING ALL PARTS OF THIS SCRIPT IS RECOMMENDED FOR ALL MariaDB
      SERVERS IN PRODUCTION USE!  PLEASE READ EACH STEP CAREFULLY!

In order to log into MariaDB to secure it, we'll need the current
password for the root user.  If you've just installed MariaDB, and
you haven't set the root password yet, the password will be blank,
so you should just press enter here.

Enter current password for root (enter for none):
OK, successfully used password, moving on...

Setting the root password ensures that nobody can log into the MariaDB
root user without the proper authorisation.
Set root password? [Y/n] y
New password:
Re-enter new password:
Password updated successfully!
Reloading privilege tables..
 ... Success!

By default, a MariaDB installation has an anonymous user, allowing anyone
to log into MariaDB without having to have a user account created for
them.  This is intended only for testing, and to make the installation
go a bit smoother.  You should remove them before moving into a
production environment.

Remove anonymous users? [Y/n] y
 ... Success!

Normally, root should only be allowed to connect from 'localhost'.  This
ensures that someone cannot guess at the root password from the network.

Disallow root login remotely? [Y/n] y
 ... Success!

By default, MariaDB comes with a database named 'test' that anyone can
access.  This is also intended only for testing, and should be removed
before moving into a production environment.

Remove test database and access to it? [Y/n] y
 - Dropping test database...
 ... Success!
 - Removing privileges on test database...
 ... Success!

Reloading the privilege tables will ensure that all changes made so far
will take effect immediately.

Reload privilege tables now? [Y/n] y
 ... Success!

Cleaning up...

All done!  If you've completed all of the above steps, your MariaDB
installation should now be secure.

Thanks for using MariaDB!
Step #03: Create database for store all data.
Login mysql terminal using below command and then type root password.
root@Joomla-CMS:~# mysql -u root -p
Create database and user using below command
create database joomladb;
grant all privileges on joomladb.* TO 'dbuser'@'localhost' identified by 'passw0rd';
flush privileges;
\q
Step #04: Setup time & date from apache php config file.
root@Joomla-CMS:~# sed -i 's/output_buffering = 4096/output_buffering = Off/' /etc/php/7.2/apache2/php.ini
root@Joomla-CMS:~# vi /etc/php/7.2/apache2/php.ini
root@Joomla-CMS:~# cd /var/www/html
Step #05: Download & extract Joomla! then restart web server.
root@Joomla-CMS:~# wget https://github.com/joomla/joomla-cms/releases/download/4.0.0-alpha3/Joomla_4.0.0-alpha3-Alpha-Full_Package.tar.gz
root@Joomla-CMS:~# tar xf Joomla_4.0.0-alpha3-Alpha-Full_Package.tar.gz
root@Joomla-CMS:~# mv htaccess.txt .htaccess
root@Joomla-CMS:~# rm -rf index.html
root@Joomla-CMS:~# chown www-data:www-data -R /var/www/html
root@Joomla-CMS:~# service apache2 restart
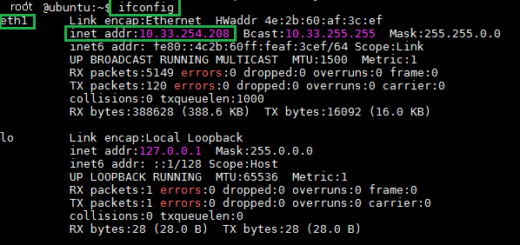
Now browse your Joomla server ip address and setup from web
http://10.66.25.10/
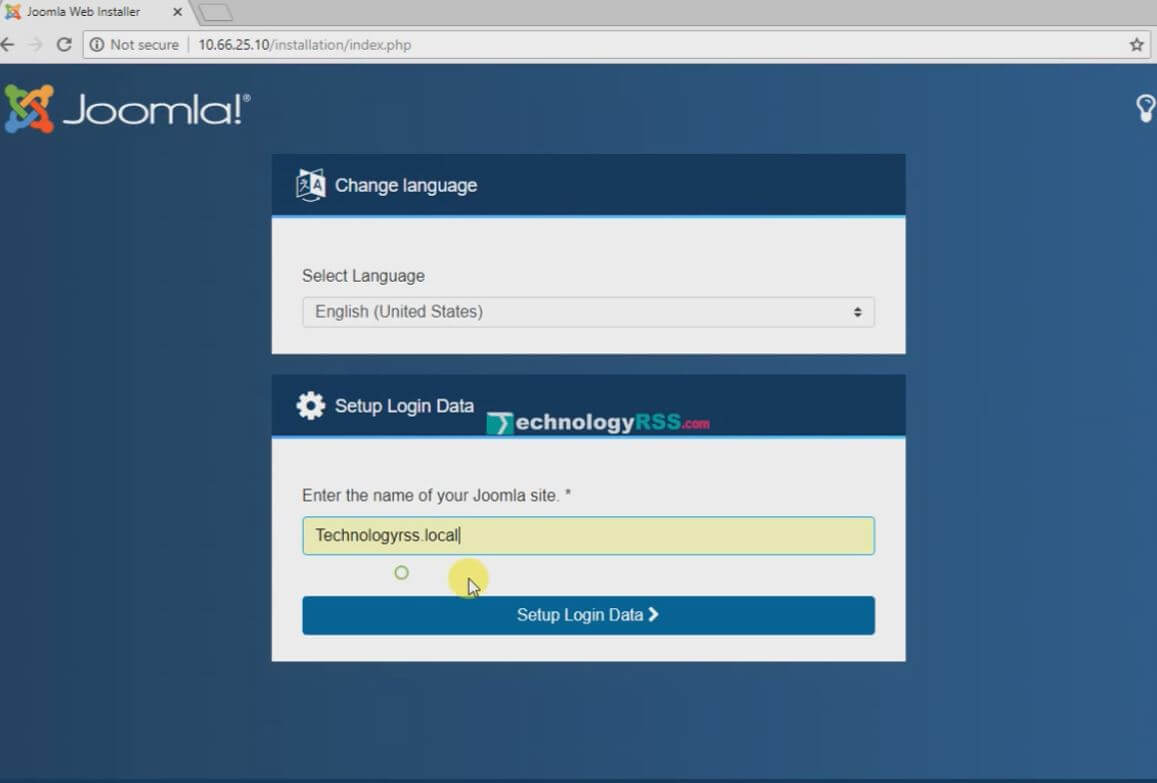
Step #06: Setup login admin account type user name, password and email address.
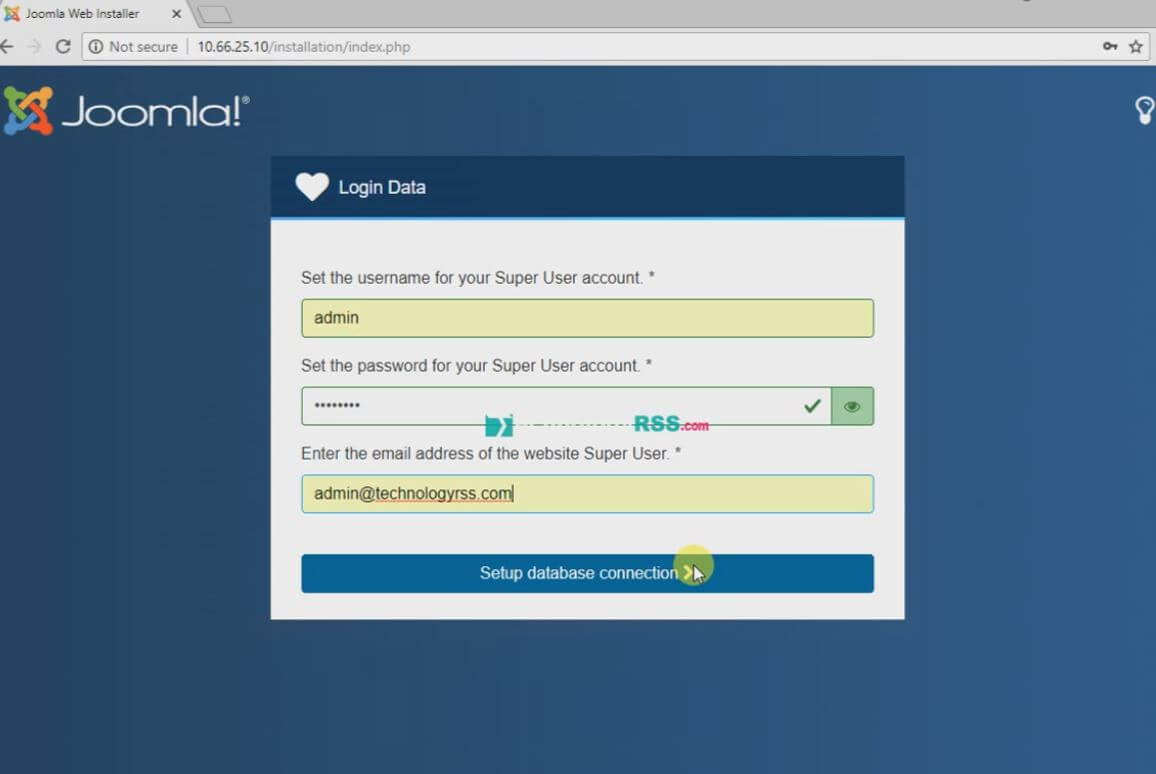
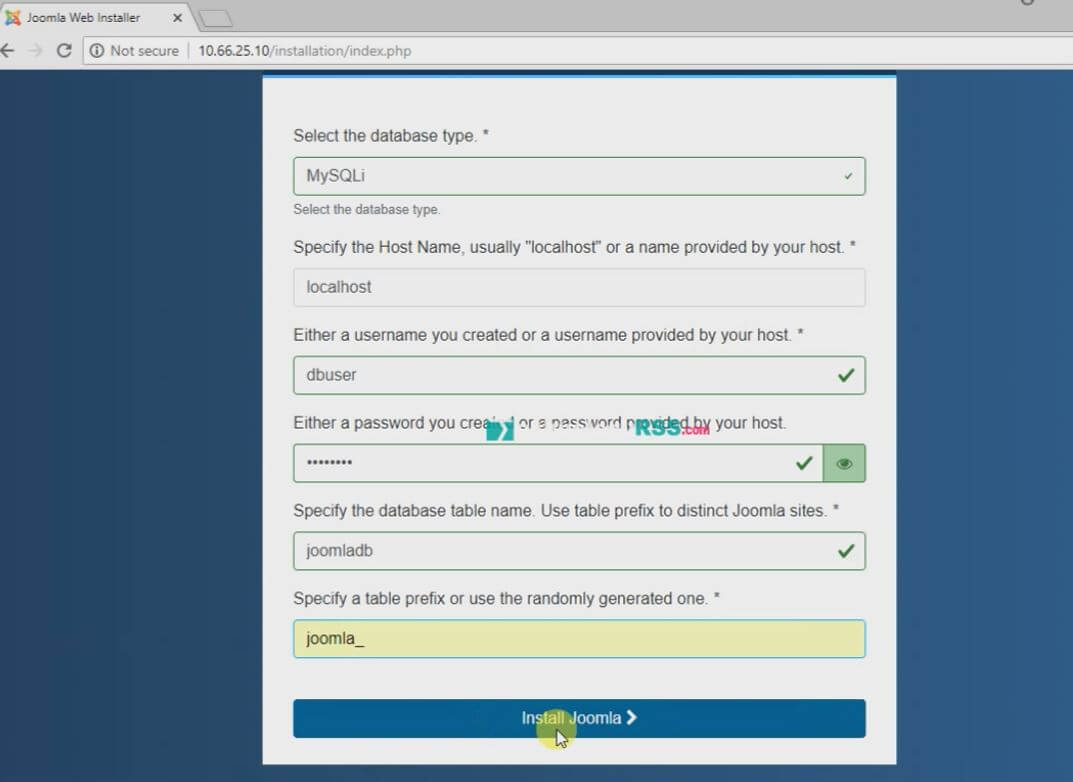
Step #07: Joomla! database configuration collect from step #03.
After complete installation process then login and using Joomla!.
If any error please see my YouTube channel and this video. Don’t forget subscribe my channel.

I am system administrator as Windows and Linux platform. I have 4 years skilled from the professional period. I have to configure Linux based system such as an Asterisk VOIP system, Network monitoring tools (ZABBIX), Virtualization (XEN Server), Cloud computing (Apache CloudStack) etc. Now share my professional skill each interested person.
Thanks to all.
Thanks to all.
Latest posts by Admin (see all)
- How To Enable SSH On Debian 13 Server - September 13, 2025
- Is Debian 13 Server on VirtualBox the EASIEST Way to Get Started - September 11, 2025
- How To Install Zabbix Server 7.4 On Ubuntu 22.04 - September 10, 2025